So, once you’ve opened Davinci resolve it takes you to your homepage. This is the place where you can select projects or create new ones. When selecting a new project, it will take you to the interface.
Firstly, you need to bring the footage into the media pool which is where you’ll find all the clips in your project. Go to file and import media. Once the right clips are selected a box which says, “The clips are different to the current project settings would you like to change”. Always say change (unless you’re working with higher frame rate but want to work at 25 or something then change that in settings under ‘Master settings’) as once the clips are imported you cannot change the project settings.
If working with RAW files, the workflow will be different. I’m going to skip these stages as I’ve already made a post about that.
So, right click on the clip(s) and select create a new timeline from selected clips. This will create a timeline and now you can edit in the edit tab at the bottom of the screen. This also allows you to do colour correcting. Which is what time going to do. BUT, before so you need to make sure you’re monitor is calibrated. Then go into settings and colour management. Make sure ‘Timeline to Output Tone Mapping’ is set to ‘Luminance Mapping’. Underneath you need to set the number of nits your screen has. To find this out google it, for me I set this to 500. Underneath that set ‘Gamut Mapping’ to ‘Saturation Mapping’. And now we’re good to go.
When on the colour tab you might find the interface its crammed. To solve this, make sure at the top left the gallery, timelines and clips tab is not highlighted. These can stay open if you prefer some of them to be. I find the timeline to be useful so normally have that open.
let’s take a look at a few of the control panels. One of the most common panels you’ll probably be using is the colour wheels panel this is where you can adjust the lift, gamma, gain and offset. The gain controls the brighter parts of the image the gamma controls the mid-tones and the lift is the darkest parts of the image and so you have a lot of control over how your image looks with these three controls the offset moves everything all at once. The wheel controls the hue and saturation while the slider underneath the wheels controls the brightness. The cross next to the gain wheel allows you to select your white point and the cross next to lift can set the dark point.
The curves panel is split into 6 subsections;
- The standard curves panel
- Hue vs Hue
- Hue vs Sat
- Hue vs Lum
- Lum vs Sat
- Sat vs Sat
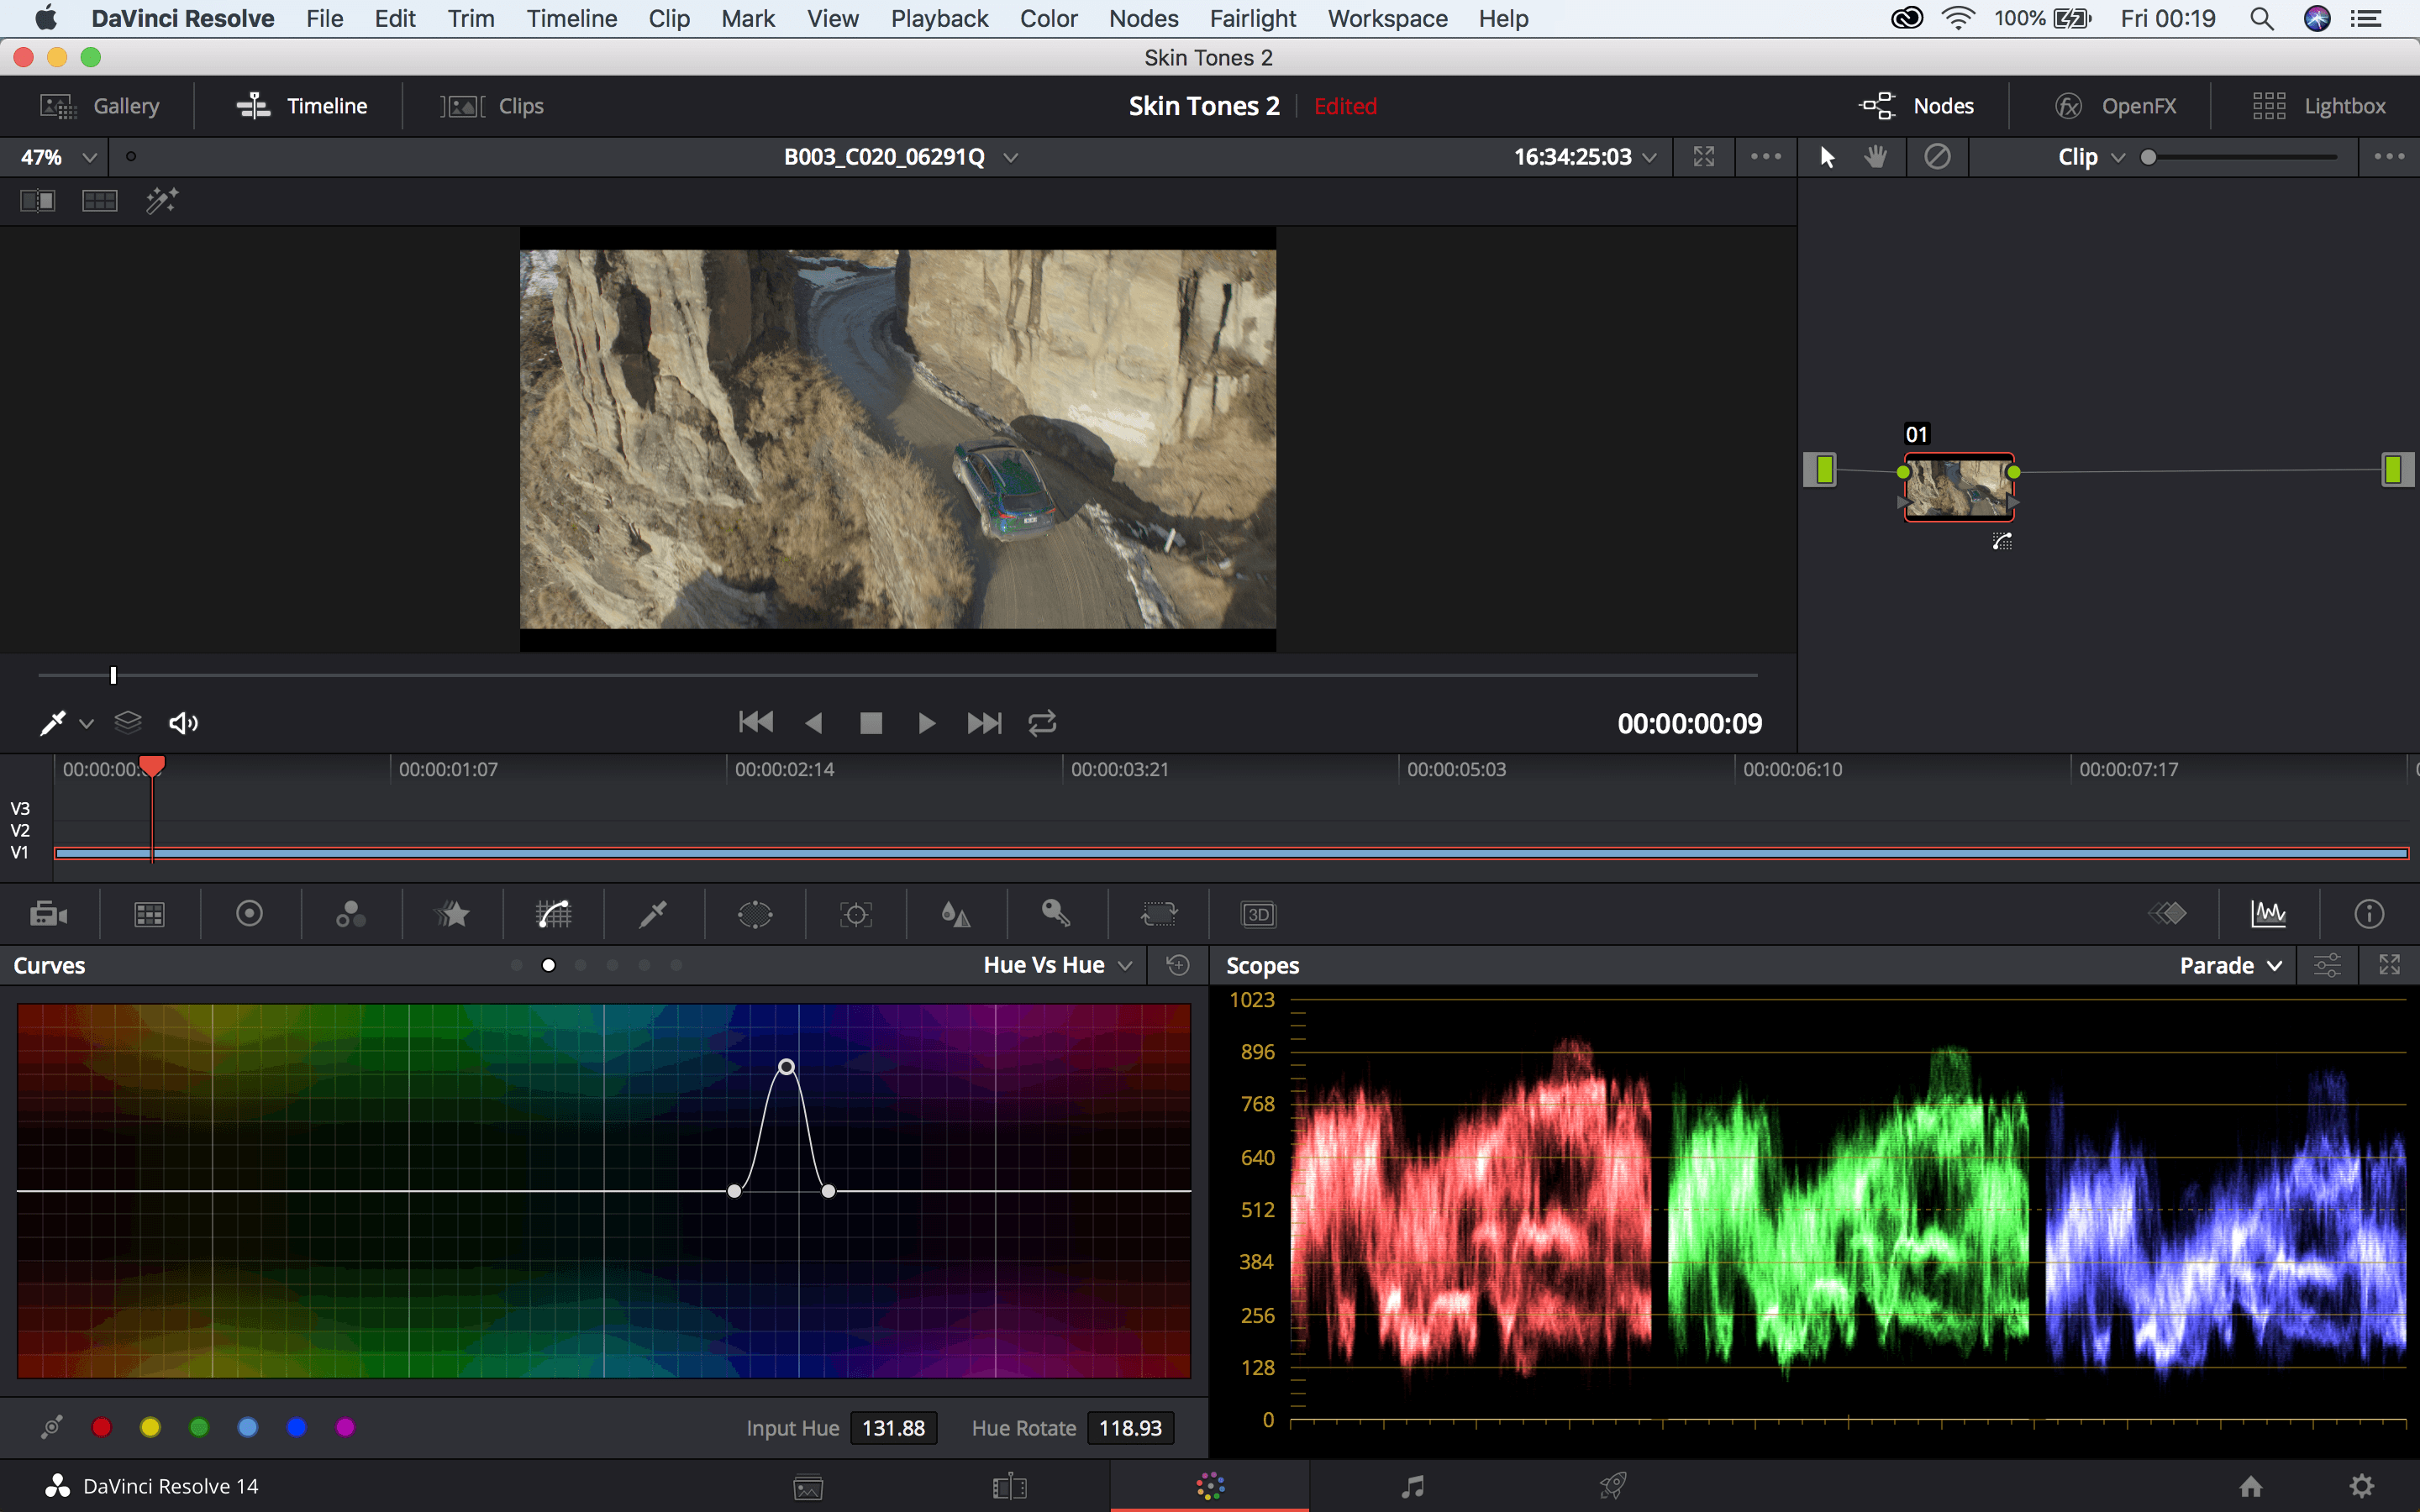
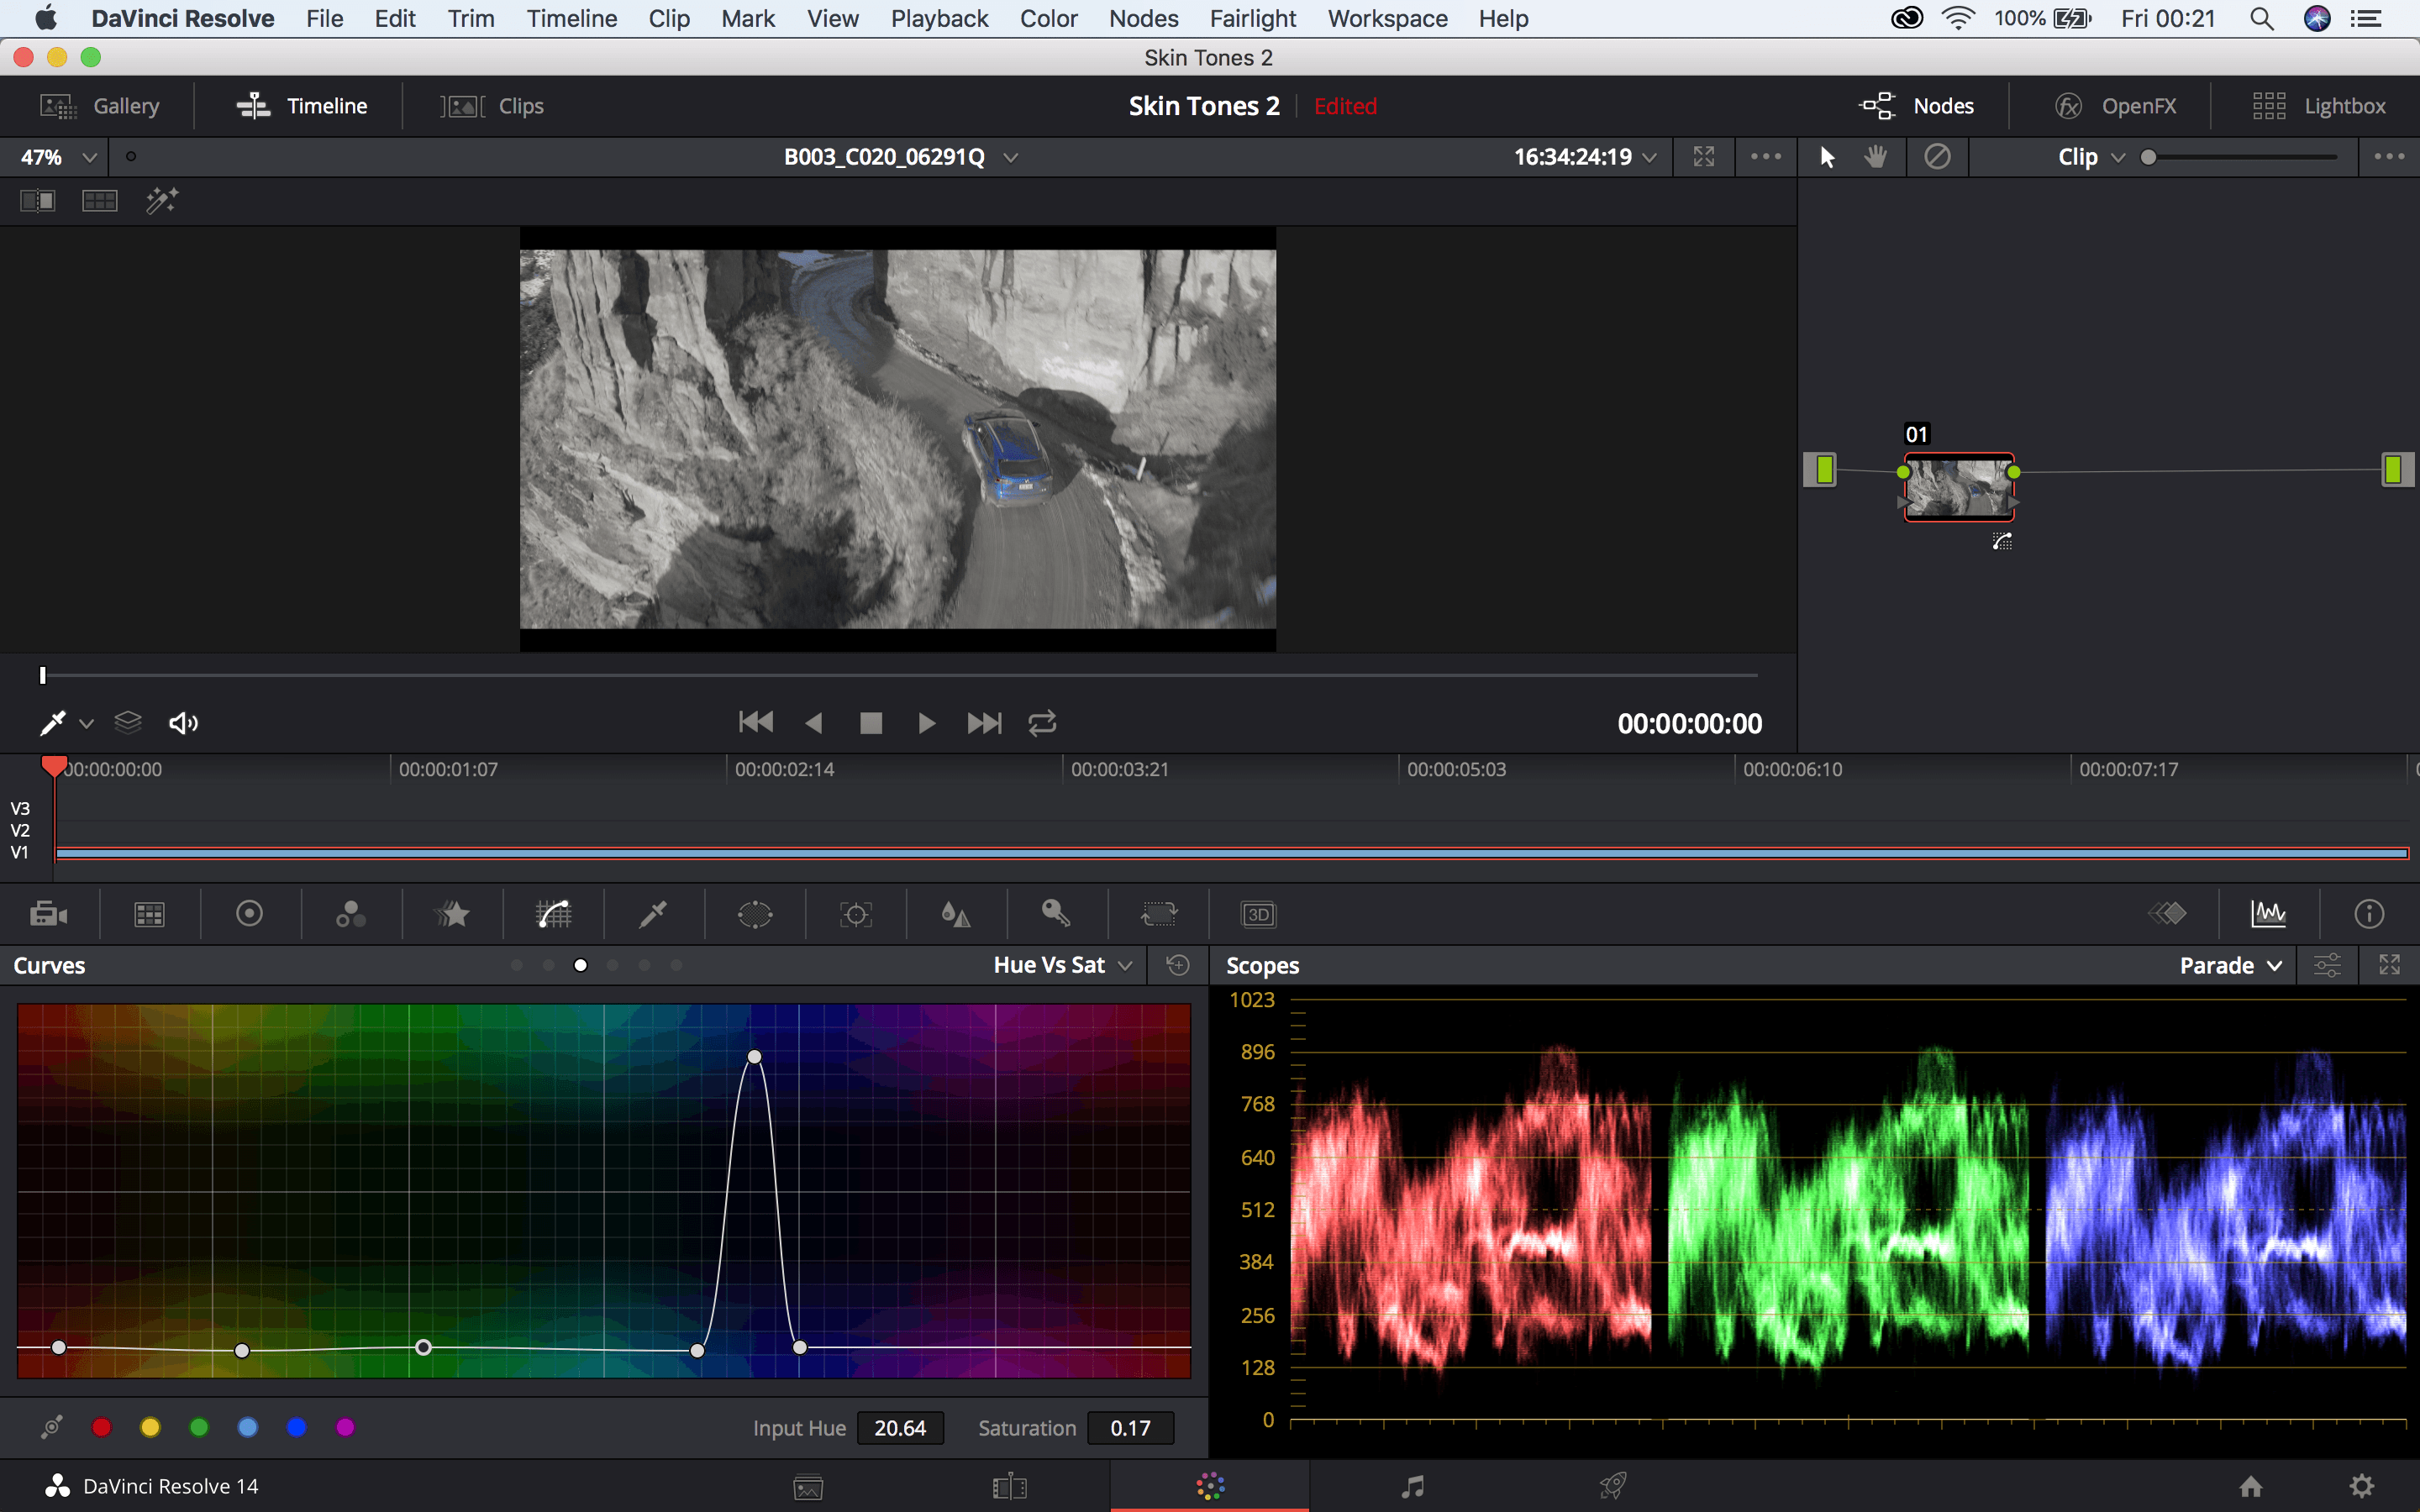
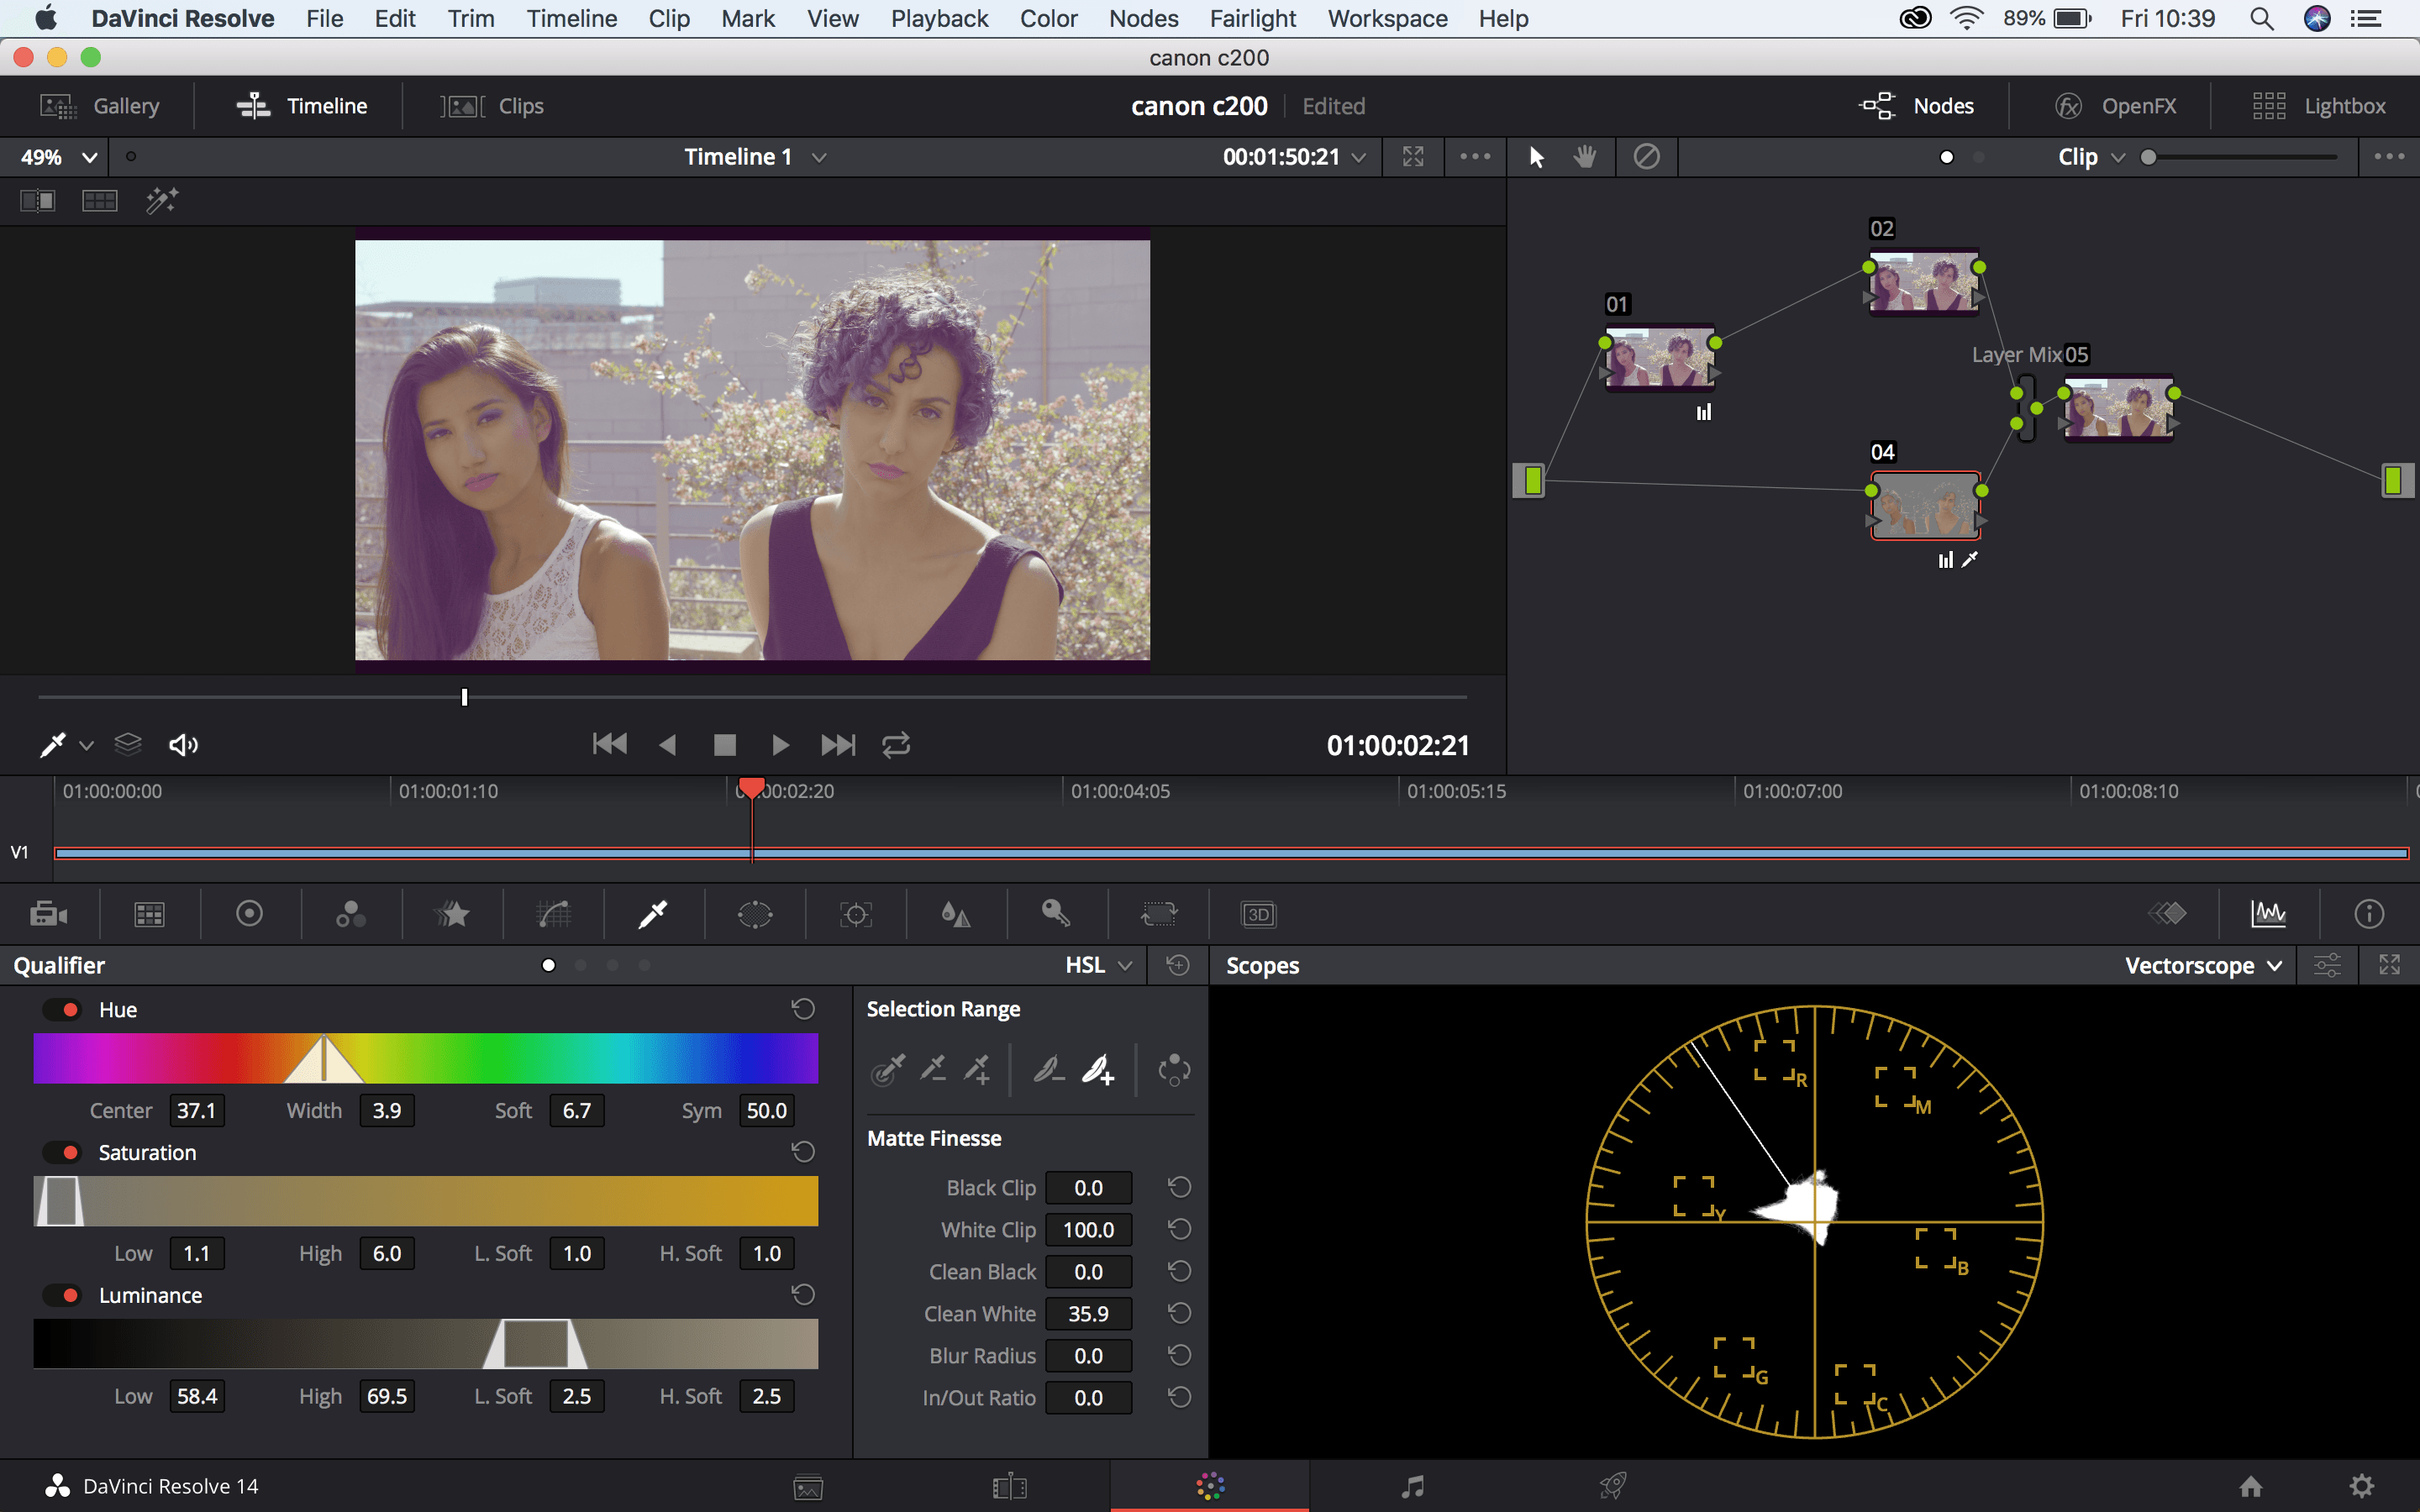
Next to the curves panel is the qualifier. This is sort of like a chroma key. Using the colour picker tool, you can select a colour and then change that using curves or colour wheels. You can use the tools to add, remover or feather the colour. You can use the sliders to assist with this as well. This method is used for setting skin tones.
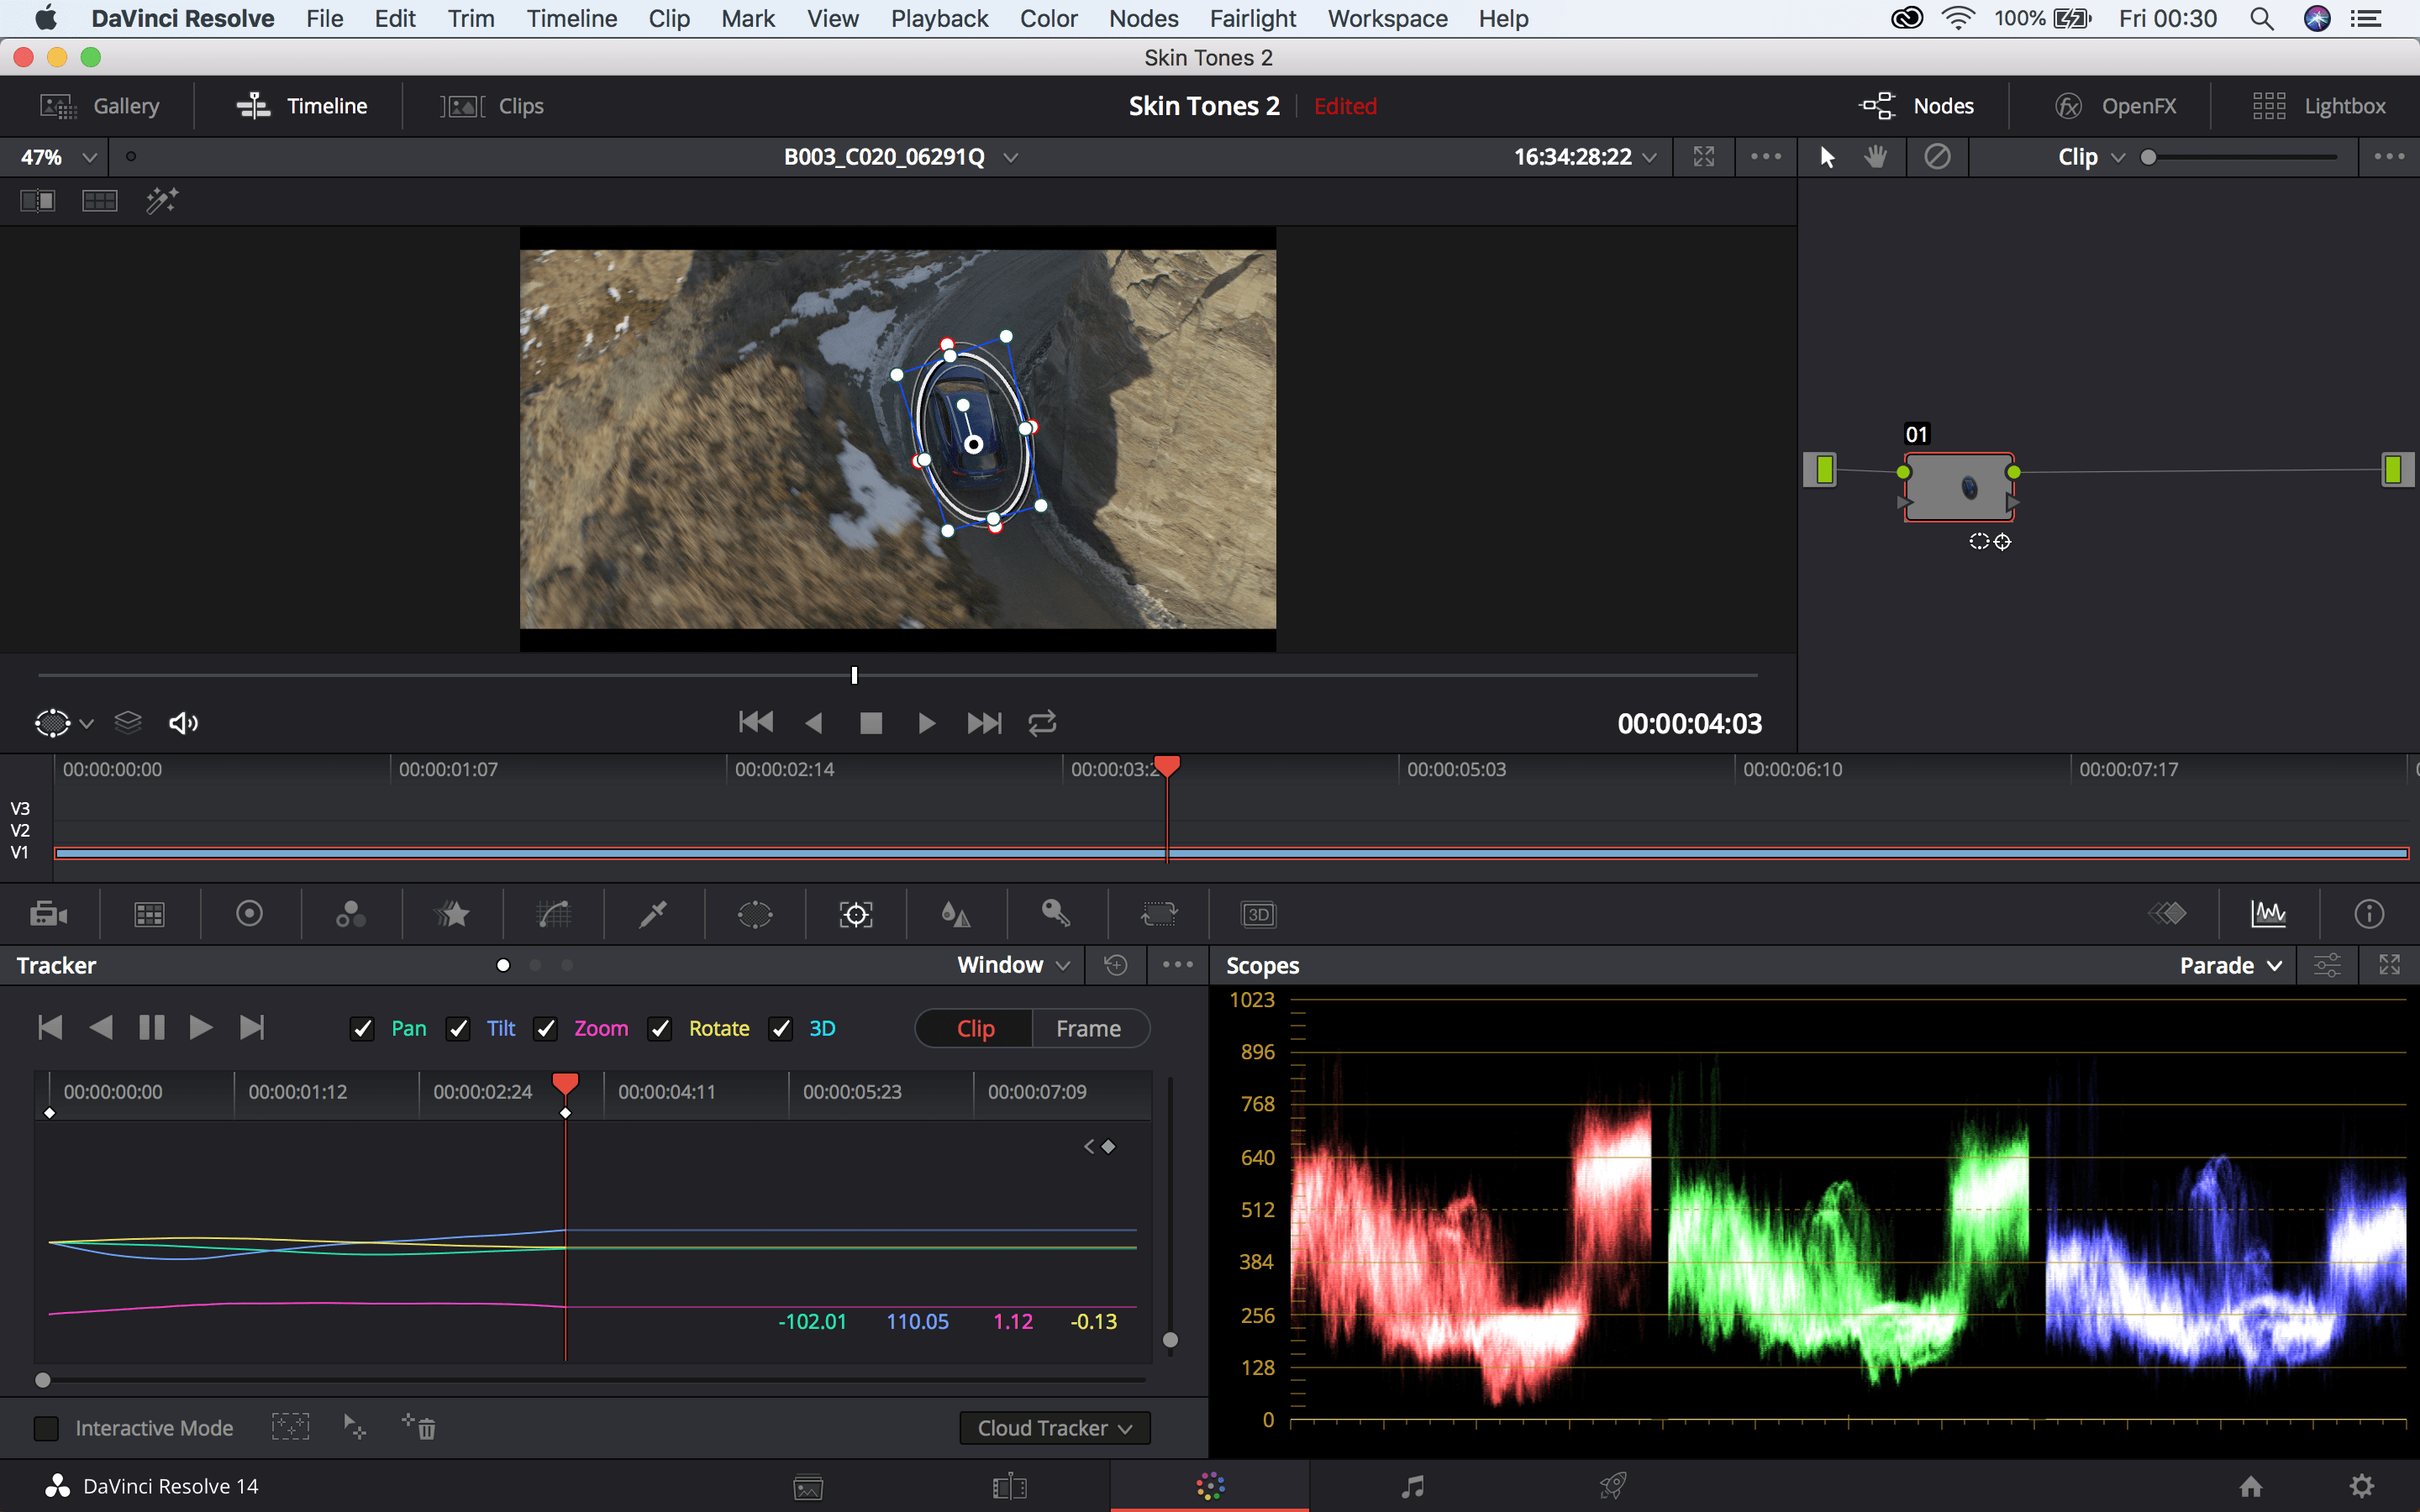
Next is the window panel which lets you mask around a certain object. There are multiple ways to do this from squares, circles or gradients. The panel next to this one lets you track your mask to the footage.
In the top right there is a tab which should be highlighted called nodes. This is similar to how layers work in photoshop. It allows you to stack different adjustments on top of each other. The little green box is your input which is the source meaning the clip you’re working with. Parallel to that is another green box which is the output. The nodes connect with each other in-between the 2 of these. If you right-click on the first node and select ‘add node’ a drop-down menu will appear labelling different types of nodes which you can choose from all of which are different from each other. These are
- Serial – This is a standard node which you will often start by using.
- Serial before – This adds a serial node before the node that has been selected.
- Parallel – This creates another node and it’s going to add a parallel mixer. A parallel mixer takes adjustments from all of the inputs and it’ll mix them together into a final output. The example below shows that the two colours are mixed together.
- Layer – If you right click on the parallel mixer there is an option to morph into layer mixer node. You can see from below they now work differently. They now stack on top of each other. The green is bottom with the red on top of it. This is because it just takes the information in the node, not the alpha and layers it.


The Layer node is a great way to separate skin tones from the rest of the grade. Below is an example of how I’ve used this.
There some of the basics I’ve learnt from tutorials and playing around with the software. Below I will go through how to start grading with a shot.
Firstly, you might want to add contrast you the clips which means lowering the blacks and raising the whites. To do this make sure the ‘Parade’ scope is open. If there is a lot of space between the bottom line and the colours then the blacks need to be lowered, if there is a lot of space between 700-800 mark and the top of the colours then the whites need to be raised. There are various ways to do this.
- Go to colour wheels, move the ‘Lift’ wheel till the bottom of the colours in the scope just touch the bottom. Do the opposite for the ‘gain’ wheel so the top of the colours reach between 700-800ish
- Set saturation which is at the bottom of colour wheels tab to 0. Then go to the ‘Curves’ tab. Scrub through the clip until you find what you think is the darkest the image is. Hover over it with the curser which should now be a ‘Qualifier’ and click on the darkest part. Do the same for the whitest part. Now there should be 2 dots in the curves graph. The bottom one represents the darks and the top on represents the lights. Moves these to match what I’ve previously said in number one. Go back to the saturation and put it back up to whatever you like.
To see how I work in more detail watch the video below in which I use some of the methods talked about above.
Leave a comment