Above is the second draft of my script. I’ve deleted some of the scenes and made the pace quicker. I still have an issue with the dialogue between characters and also have too much exposition. I will update in a few days.
RAW Workflow with RED Footage
RAW Workflow with RED footage
On the 21st of Feb, I attended a demonstration about how to work with RED/RAW camera footage in DaVinci Resolve. Below is what I’ve learnt.
Potentially I would be using a RED camera to film a short film. Because I’m not familiar with the process of using the footage I needed to learn. Luckily a demonstration about the workflow was put on which I attended.
In this demo, I first learned that rec. 709 is the standard format in TV’s, projectors, Video cameras and more. Cameras such as RED and ARRI do not shoot in Rec. 709 but RAW. Because they shoot in RAW the footage is flat and need to be put into a standard and must be colour graded otherwise whatever media you view it on will assume what the colours are.
When colour grading you must calibrate the laptop screen/ monitor you’re working on to Rec. 709. This is so you will know how the film looks on TV screens etc.
The Workflow
Firstly, bring the selected footage into DaVinci. When you first import raw footage into DaVinci it is very important not to mess with the duration of the clips or the frame rate because at this point were just creating proxies.
Then drag into media pool and right click selecting ‘New timeline using selected clips’. Once this is done move over to the colour workspace and select the Camera Raw section. Under the ‘Decode using’ drop down menu select ‘clip’. ‘Colour science’ needs to be the latest available option for example ‘Version 3’. Gamma curve needs to be selected for REDLog Film.
Under the settings in the bottom right-hand corner select the Colour management submenu. The first thing to change here is the ‘Colour science’. It should default to DaVinci YRGB, this need to be changed to ‘DaVinci YRGB Colour Managed’. This allows you to edit the colour space input and output. Because the footage is RAW the Input needs to match that so select REDlogFilm. The ‘Timeline’ and ‘Output’ colour space needs to be the same and Rec. 709. As that how it will need to be exported. Underneath make sure Luminance mapping is selected and Saturation mapping is selected under Gamut Mapping.
The next stage is to export it. Below are the steps to follow for the process;
- Deliver – change codec to Avid ‘DNxHD’ 1080p 36 8bit
- Don’t use ProRes
- Render as individual files
- Don’t give custom name – Source
- Save into a subfolder ‘Proxies’
- Render out
- Save project
Once this is done open Premiere Pro, make a new project and import the files that have just been exported. Select the clips and make a sequence from the clip. It’s very important that no colour adjustments, Warp stabilizing etc are made as Davinci won’t be able to use these files. Save the project and export as an XML in a new folder titled ‘Data’
Move back to DaVinci and File – import – XML files. Unselect auto set project settings, source clips into media pool and sizing info. Now that process is complete you can work on the colour grading.
I feel that learning this process will be very useful in my work this term and potentially later in life. There are a few questions I need to ask/research such as;
- How to calibrate monitors
- How many Nits should be used?
- Exporting settings?
- Workflow between DaVinci, after effects and Premiere Pro.
I went to the RED website and downloaded some of the footage available and went through this process and then did some colour grading of my own as seen below.
Learning the process is incredibly valuable, if I was without this knowledge and continued filming without it, it would have caused a lot of problems. I plan on doing a proper Colour Grading test once I have the test footage.
Script Draft 1
Above is the first draft of my script. At 12 pages it’s very long. I’ll look to reduce the number of pages to 7-8 in the next draft.
I feel that this version is full of exposition, pointless dialogue and scenes that don’t need to be there. Its good that I’m aware of this and I’m not attached to this version s this will be counterproductive to the progress of my work.
Cinematography – First thoughts
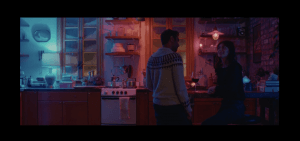
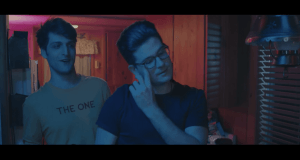
There are two examples of how I want this short film to look. One is taken from the series Masters of None season 2, episode 10. In one scene the room is separated by Blues and red/pink colours. I want to achieve something similar to my film. The other example is a short film called ‘The Woods’ from the YouTube channel Sugar Pine Seven. They use similar lighting to the episode previously mentioned. They mainly use light blue, normal light bulbs, and pinks but keeps the scene low light. This could have been done to keep the focus on the characters rather than the lights.
I want to go for this look as a way to symbolise the moral compass of the two main characters. The lights used would go from blue to red as the film goes on.
Below are the two example from above;
2D animation First thought and Practice
I want to incorporate some aspects of 2D animation. Firstly, I will look to use Adobe character animator. Because of the use of colours in the film, I will have to draw in relation to this. Before I commit to this method I will have to practice this before. If this method fails I will need to look to other methods or change the script.
Below is the video process I went through in my first practice.
Firstly I tried to use an exported version of a Puppet I used last term. I wanted to explore this method as I had big issues with the dynamic link. As you can see no matter what mode the file was in it always looked transparent. After looking at different way to fix this I gave up and used the dynamic link which looks a lot better. One thing I have to keep in mind is perspective. I need to think about the height that the character has to be as well as the lighting. The scene will be lit but the character won’t have that lighting. I will have to keep that in mind that I need to draw the character relative to the scene.
This was the first time in over a year that I’ve tried to track something in After Effects. My memory was fairly hazy in this respect. it took me a moment how to apply to track the motion rather than just play through it. As you can tell the tracking in this isn’t very good. The puppet is jumpy. I will have to research a way to prevent this from happening as it could cause a big headache in post-production.

